I work with a lot of voice talents who have their own home studios. After all, my business is built on utilizing male and female voice artists that are able to provide voiceovers at a competitive rate. Competitive because of their low overhead. They don’t have to pay studio fees and they don’t have to pay a producer or an engineer.
To be successful in a voiceover business, talents also need to be able to provide quick turnaround, including overnight delivery or early the next morning. This is especially true if voice talents are not full time and have a day job to work around.
Yet, in this day and age is continues to surprise me how many radio announcers are doing freelance work without a home studio. Working during the day at a radio station they simply use their employer’s recording studios. This means these same announcers often need to pay a few bucks to the in-house producer when voicing a freelance spot. Even if they are able to slip into a voice tracking booth or the main studio on their own, they are limited to only providing voiceovers to clients during the day.
Voicing from a day studio also limits earning potential from the numerous agencies and production houses like mine who rely on quick turnaround. In addition, as your voiceover business grows you simply won’t have time during the day to get all the work done.
Recently, I even had a client at an advertising agency who is quite good at voicing characters, but because he doesn’t have a home studio he wasn’t able to voice an impersonation of a celebrity we needed for a car dealer spot. Therefore, I had to out-source a voice talent to do it. I mentioned to my client how simple and economical it is to set up a quality home recording studio. It got me thinking. Why not do an article that shows newbies and pros alike how to put together a home studio? It doesn’t take a lot of technical know-how and the cost is quite economical.
In the past, the biggest hurdle to doing voiceovers on your computer was the need to install a professional sound card. You simply couldn’t rely on the factory sound cards found in computers. Voicing on a lap top was even more difficult as you would also need to spend extra dollars on external gear that was not always USB compatible. This was the case when I set up my home studio back in 1997. As I continued to upgrade my computers, it was always a hassle.
Today, all you need are three things. A pre-Amp, a microphone and recording software. I’m going to show the three pieces of equipment I use and all you need to do is duplicate it. This tutorial is for a voiceover recording. It’s not meant for musicians. Although, with this set up you would also have the ability to plug in a guitar or piano keyboard to record, along with a mic to sing into if you like. It also works for podcasts and doing YouTube videos.
1. The Pre-Amp
A pre-amp is what you’ll need to act as your external sound card. Simply plug it into your computer via USB. It has phantom power for your studio microphone, which should be a condenser mic. (more about that later). The output for the UBS is in the back. Your microphone plugs into the front.
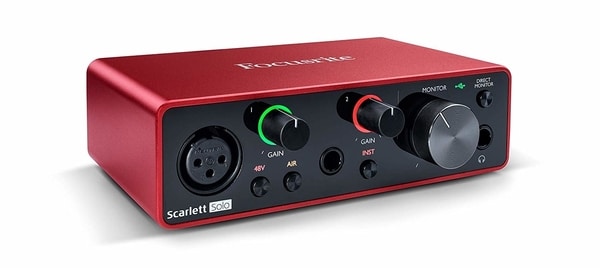 I use the Scarlett Solo by Focusrite. Since I bought mine a few years ago, my version is the 2nd generation, which has the traditional RCA outputs in the back for my self powered computer speakers. The 3rd generation version shown above has standard line outputs in the back, but you don’t even need speakers hooked up to review your audio. The front panel has a quarter inch headphone jack. If your headphones are 1/8 inch you can easily get a converter to 1/4 inch.
See all of the Focusrite products here. You will notice that this company also sells a complete studio set up, including a microphone, headphones and cables. For the small additional price I would not recommend it for pros. The microphone will not be great quality.
You can buy a version of the pre-amp that has two microphone inputs in the event you want to use it to produce a podcast or voice dialogue spots with two voices at the same time. The quarter inch input on all models is for a guitar or keyboards.
2. The Microphone
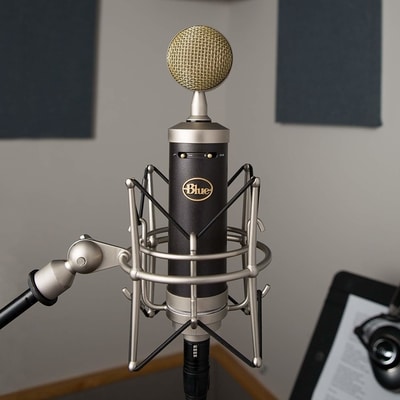
As with all radio broadcasting, whether live on-air or voicing radio commercials, I would only buy a condenser microphone and not a dynamic mic. This allows for a rich sound with your mouth positioned a few inches away from the mouth piece. Any pre-amp you buy should be able to power your condenser microphone, which the Focusrite does. This is called phantom power. Dynamic mics are not totally out of the question, but there are challenges to get them working properly.
I use an AKG C535 EB that has been discontinued. I’ve been using it for 22 years. I bought a second one a few years later to do multi voice commercials. At time of purchase it had a retail value of $350 USD. Based on my research comparing the latest microphones on the market, that price point is fairly close to what you should be spending for decent quality.
Remember, our goal is a quality system at the lowest price. Stay away from the much cheaper $50 to $100 microphones. They can often be noisy and many of them are UBS mics which need to be plugged directly into your computer. You’re only asking for trouble when working out any bugs interfacing with your inferior computer sound card. Make sure your mic is XLR, which is what you need to plug it in seamlessly to the Focusrite pre-amp shown above.
A comparable mic to what I have been using for years is the Blue Microphones BabyBottle SL.
There are comparable mics on the market, but some are dynamic mics. There doesn’t seem to be many options available for the next level up before getting into something like the Neumann TLM-102 Studio Condenser Microphone. For voiceovers, I would say that the Neumann is a bit overkill. I work with a lot of voice talents delivering a variety of audio quality levels. A producer can do a lot with processing and effects to make any dry voice over sound great, as long as the mic they are using is clean and good dynamic range.
Perhaps if you are doing live Source-Connect or ISDN sessions with big agencies, you may want to consider a Neumann for only a $300 increase in price. Neumann has been trusted name among the world’s best recording studios for decades. Their microphones can run in the thousands of dollars.
Miscellaneous Accessories Needed: The additional items you’ll need to operate with your mic are a pop filter, XLR cable and a desk top mic stand.
An optional accessory for your studio is a Microphone Isolation Shield. Basically it’s sound baffling without the install. You don’t need this if you are voicing in a confined room a bit of furniture. If you’re voicing in your kitchen, you’ll need this piece of equipment.
3. Audio Software
With your pre-amp and microphone set up to rock the freelance voiceover world, all you need is software to record and save your audio. If you are only providing dry VO’s to clients that are saved to mp3 or wav file, you only need a single track editor. No need to pay for a subscription model for multi track studio software. For major production I use Adobe Audition.
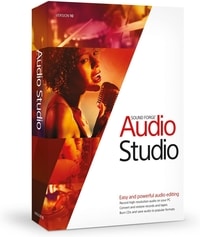
But for a simple less expensive software option that’s available on a single purchase download, I have also used Sound Forge. It also comes basic vocal processing features.
Or you could try the totally free recording software by Audacity.
A Word About Audio Quality
Having dealt with a lot of voice talents over the years, I have worked with a variety of quality levels on the dry audio delivered to me. As long as your mic is of good quality, mic placement makes up for the rest. Every voice is different. Each talent has to find the positioning that makes them sound the best.
With the internal processing available within a software program like Sound Forge, I’ve been able to make inferior audio sound good for a radio commercial or narration project. The important thing is that the voiceover has been recorded from a good starting point, which is a good clean sound with decent dynamic range. This is why voice talents should stay away from cheap microphones.
Full Shameless Disclosure
All of the links in this article are to Amazon. By clicking and purchasing through them I will receive a small commission for my referral. I appreciate your loyalty but even if you don’t purchase through this page I am happy to pass this information on to you.
Here are the Canadian Links to the Products Featured
- Focusrite Scarlett Solo
- Blue Microphones BabyBottle SL
- Pop filter and microphone stand
- Sound Forge Recording Software
Everything I’ve explained in this article also works for a Podcast. It really is the easiest and least expensive home studio solution for anyone who wants to record their voice.